Followers

Showing posts with label Nail Accessories. Show all posts

Feb 27, 2014

Nail Art Tutorial : Contrasting Colors


This is actually suppose to be an entry for the one month challenge that I wanted to participate on but I wasn't able to post it in time. I don't want to waste it because I really like how it turned out.

I searched the internet for contrasting colors and this is the happiest combination I found. I matched a pastel yellow from the Cotton Candy line of Etude House and Dark Silver nail polish from Barry M. I wanted to make a checkered patter but I ended up with only four squares for my thumb and middle finger and half on my pointing and ring finger.

I think my pinky is also a little small and I wouldn't want the design to be repetitive so I decided to paint it in solid yellow color. Then again, I thought it would look so different and bare to just leave it that way so I used black gems to create a cross. 


If you don't really like so much gems on your nails, you could use a nail tape for the pointing and ring finger. That's how the original design was suppose to be but I couldn't find any nail tapes. Good thing it turned out really pretty. ^_^

This is it for now.... I'll see you on my next post... ^_^

Feb 5, 2014

Nail-Art-A-Go-Go : Monochrome


Here's another day hoping you'd like my design for the challenge. I was suppose to make this post yesterday but I was kindda tired with the day's work. Exam week is a lot more tiring than it looks.

Anyway its the 4th day of the nail art challenge and today's theme is monochromatic. Honestly, when I first saw the table, I didn't know the difference between achromatic (click here to see my achromatic design)  and monochromatic I had to google it. Basically, monochrome means you have to use one color in different shades ranging from the lightest to darkest to emphasize the design.

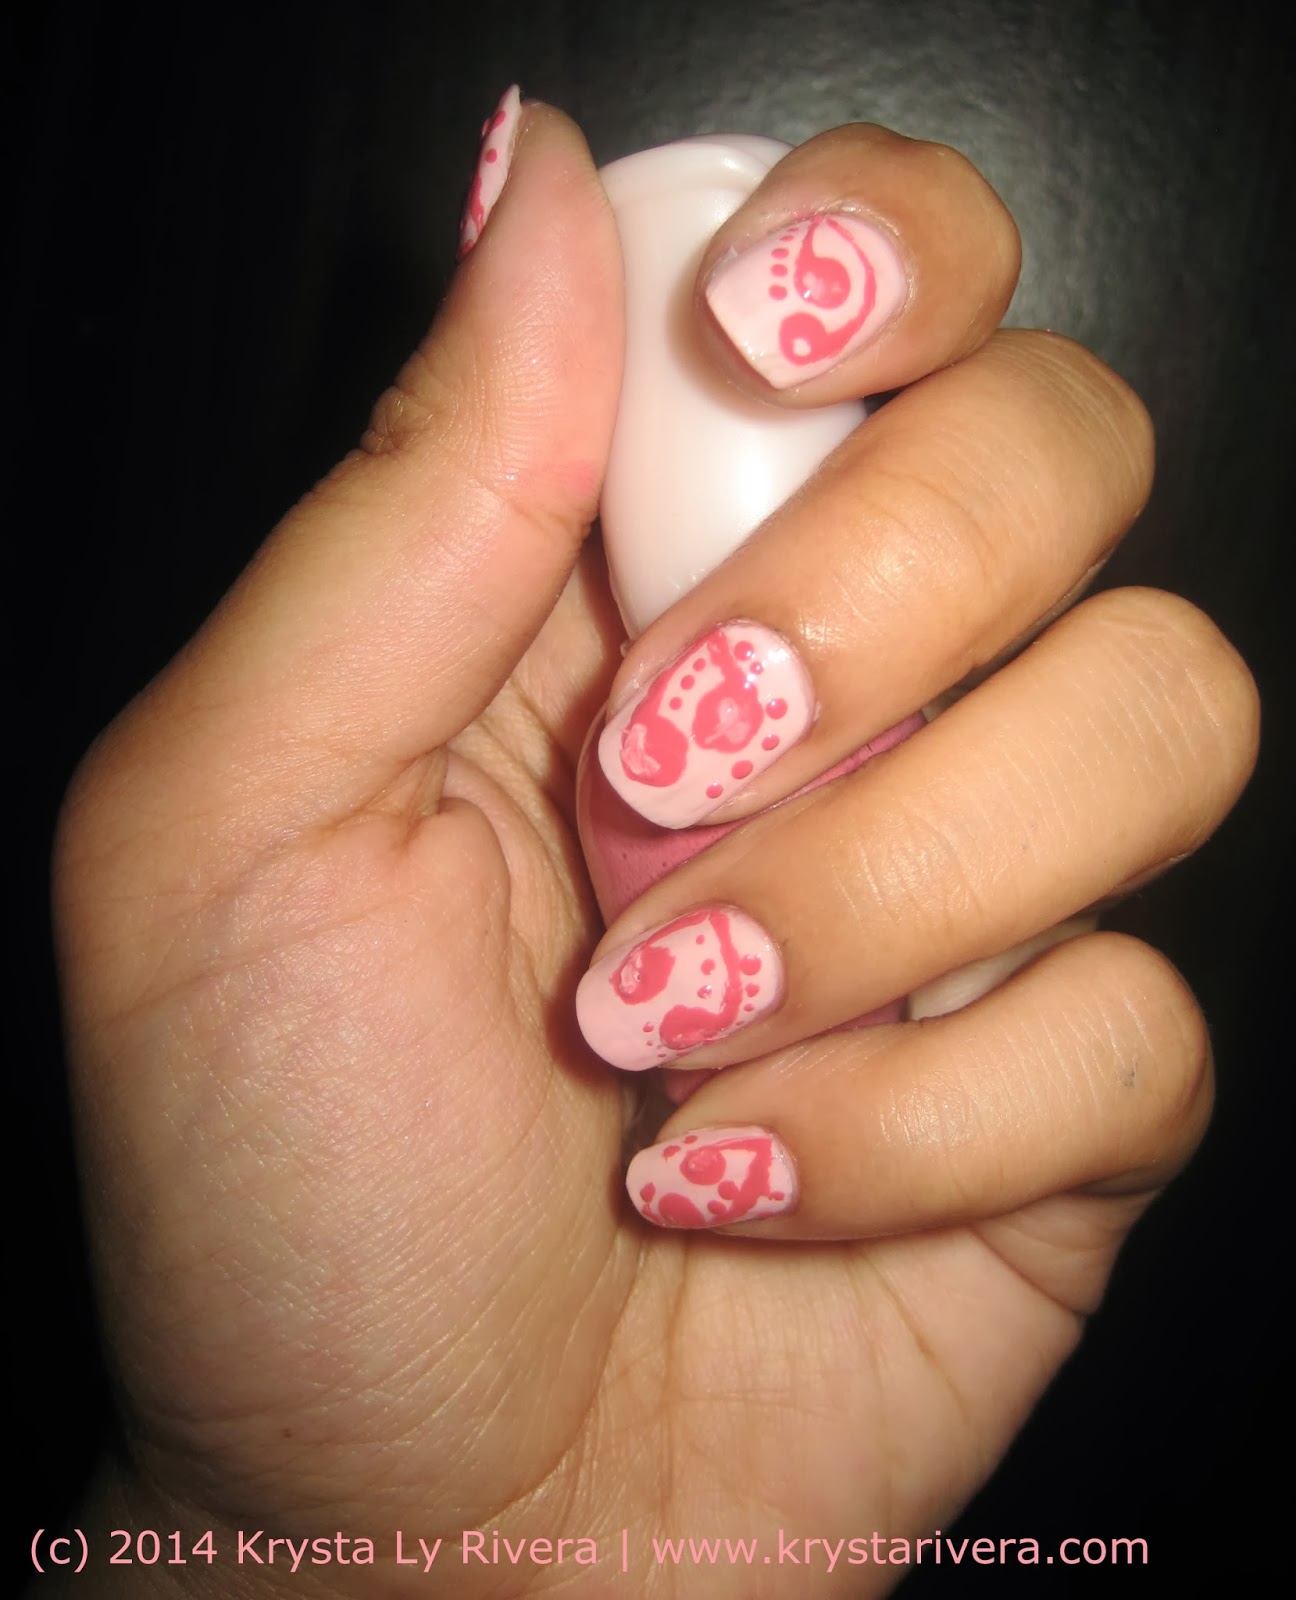
For this challenge, I used my Etude house nail polishes. I used a pale pink color for the base, its PK003, and a darker one in BR301. I simply made a big blob of polish then spread it out to make the tail imitating a heart shape. Then I added small dots for decoration.

This is it for the 4th day. Check out my blog again tomorrow for the fifth day of the challenge. If you love it, give it a g+ ^_^

Feb 3, 2014

Nail-Art-A-Go-Go : Warm vs. Cool


This is the third day of the challenge and today's theme is warm vs. cool. So far, the categories are easy and work isn't getting busy yet.

Anyway, I'm not so sure if I have any inspiration on this one. I just thought of using navy blue and lilac because I like the colors and they look good together. They also fall right for the theme. ^_^

To make sure I'm not gonna make any mess on the side for the lilac, I used scotch tape to cover it. After painting the other half with blue, I took off the tape and colored the other half with a shimmery lilac. Then I simply put dots on the side, four for each nail. I wasn't able to get some nail tapes so I placed gems in the middle part instead to cover up the line. It's not that it doesn't look good but it looks a bit unfinished if I'd leave it that way.

There's something I want to change though. I really should've looked for some nail tapes or probably used a smaller gemstone for the center. The ones I used looked as if it dominated my entire nail.

Oh, well. I hope you also liked this one. See you tomorrow for my next nail design.

Feb 2, 2014

Nail-Art-A-Go-Go : Jewel Tones (Lotus Flower Inspired)


Today's the second day of the challenge and the theme is Jewel tones. The nail polish I used is from Nailtopia. I don't really remember what number it was but it looks like garnet red to me so I decided to use it. I also don't own the polish. I borrowed this one from my cousin since I honestly don't have much variety of nail polish colors. Most of what I own are pastel colors.

Feb 1, 2014

Nail-Art-A-Go-Go : Achromatic Nails (Dots and Bows)


It's been awhile since I made any nail art tutorial. I honestly don't remember posting any nail art tutorial since my camera broke so until I can buy a new one, I'd be posting photo tutorials instead.

Anyway, I recently joined Polish Pashionistas on Facebook because I read from one of the blogs I followed that they were having a February Nail Art Challenge called Nail-Art-A-Go-Go and I wanted to join. They are not giving away anything. It's a simple daily challenge for the whole month of February.

Everyday you have to make a nail art design according to the category. I saw it last month so I had a little time to think over and do my nail designs. It was a bit difficult because it's different when you do you're designs on paper compared when you apply it on your nails.

First day's theme is Achromatic. That means the color range you have to use is black, white and gray only. I had several ideas to be honest. I wanted to do bamboo shadows, notes etc. but I ended up with this one because apparently it's the most decent I was able to make with my shaky hands.

The nail tip is frosted white, same with the dots but only with a different color. Then I used a regular gray to make the band looks like it's frilly and to emphasize the bow.

That's it for today... Please check out my next design tomorrow.

Jan 25, 2014

Nail on the Go : How to Apply Fake Nails


I love doing my nails but I just don't have that much time to sit around and do it unlike before. So I would usually just go out with clean but bare nail. Last Christmas, my friend gave me these fake nails as a gift. You could find a lot of these in stores even in Hortaleza but if you like something with more intricate designs, you can visit the Beauty Bar although it is much pricey. If you plan in buying the expensive kind, it's fine since you can still use it again.

1. The box have 12 sets of nails with different sizes that may or may not fit your nails. So the first thing you have to do is find the size that fits you. If it doesn't fit, get a nail nipper and cut it on the sides or the bottom following the shape.

2. Then get the nail glue and apply it at the back of the fake nail.

3. Attach the fake nails and press it against your nail.


And that's it, you're ready to go. You have to find a really good nail glue for this one 'cause you don't want it coming off. You might also want to cut it shorter since it is difficult holding anything with extra long nails specially texting. ^_^


Jan 1, 2014

Year End Haul (Shoes, bags, accessories and other random stuff)


Happy New Year to all my readers. Another year have passed and I didn't really made this year as promised so I won't be making another blogging resolution that I would most likely break. I feel really sorry for that. After the operation, I had a change of occupation and started taking my Masters in Management making me busier than I used to.

This year, I'd like to start my blog with a haul of some of the things I purchased and received as gifts. Just a disclaimer, this post is in no way intended to brag about what I have. And the stuffs are things that I accumulated over some time and some were given as presents . Let's just say, this is my way of thanking everyone for all the presents they gave me and keeping track of my purchases.


The only time that I love to buy shoes without regret is during a sale. I went to Ayala for some Christmas shopping and I found a really great deal at Call It Spring. Originally, the leather and lace shoes cost Php2,195 each but I only got it for Php650 per pair. They're really comfortable and I so love wearing them specially the leather shoes. It's currently my go-to shoes. I'm kind of more careful when using the lace one though because I don't want it getting stained. It's really going to be perfect for spring until summer because of the color. The rubber shoes would be my parent's gift for me. The color is just so pretty and girly but the tough kind of girly. :p


The next would be a bag from Celine and an inspirational book that my cousin gave me as a Christmas present. Honestly, I just got it today. I wanted to buy a Celine bag for myself but I'm having second thoughts about it because I'm really getting off my holiday budget but I guess now I don't have to worry about it.

Mar 5, 2013

Nail Art Tutorial : Gothic Lolita Nails


It's been ages since I did any nail art tutorial. Since I have so much time right now, I'm hoping I could do more of these. This is quite simple so I decided to make it a written tutorial only. I used a combination of regular lavender nail polish from Etude House in PP903 and and on top of that is shimmery lavender PP905. I combined it because the shimmer one would be too light if I were to use it on its own. The dark silver nail polish is from Barry M. Magnetic Nail Paints.

Jul 27, 2012

Nail Swatch : Magnetic Nail Effects by Barry M.

I have to new additions to my nail polish collection. I won these two Magnetic Nail Paints by Barry M. from Charlotte's Nails. One in magnetic blue and the other in dark silver. Both have rectangular caps where the design is drawn making it easier to distinguish and on top of it is the magnet. It has this stopper like thing at one end of the magnet so the cap can rest on your fingers without touching the nails. The brush handle is long enough for comfortable application and the bristles glides smoothly too.

Jul 14, 2012

Nail Art Tutorial : Lovin' Ice Cream

My second summer nails! I don't know if it looks like it but it's a light cranberry ice cream with syrup and chocolate sprinkles. Since it rains a lot in the Philippines now, I chose a shimmery type of really light pink, a regular brown polish to be the syrup and a few micro beads for sprinkles. I got the idea from a previous edition of Nail Up, a Japanese Nail Art Magazine, from Eki's blog. If you like to read about cute finds and see Japanese Magazine Scans you should visit her site. She also make good reviews. Click here to visit her site.

Apr 22, 2012

Haul : Wish Nail Art Accessories


I bought three sets of these from Watsons for Php 69 each. A set in rectangular, tear drops and assorted shapes. The packaging is fine and easy to store, the dividers aren't that useful though because it passes through and the colors still get mixed up.

The pieces are cute and the colors are not all childishly girly. Most of it are jewel tones which are suitable for adults. The sizes of the gems suits perfectly on my nails and they are also shinier than the border gems I use as an alternative ( Haul : Nail Art Accessories ). But like the nail gems alternative I use, the shine lessens when you swipe a colorless nail polish on it.

Every set includes a small tube of glue and a nail stick. The assorted gem set have an extra mini nail file with bear prints on it. The nail file and sticks are useful but one of the nail glues is quite disappointing because it's already dried-out so don't rely much on it. It's better if you buy a glue separately since they also offer the same at Watsons and I don't have any complains about its quality.

Apr 14, 2012

300+ Followers Giveaway (INTERNATIONAL) CLOSED

Finally, my very first followers giveaway is ready. The prizes aren't much but I hope you'll like it and join. 

Prizes:
Klick Nail Sequence
Klick Nail Chips
Klick Nail Art Brush Set
Klick Nail Dotting Tools
7 Wish 3D Nail Art Stickers and 3 from Hortaleza
Yazoo Nail Glitters Set
Yazoo Nail Gems Set
Yazoo Micro Beads Set

The giveaway is open intenationallyYou must be 18+ or at least have parental consent to join. For the comment, the correct format must be followed and the date must be within the duration of the giveaway. More than one comment on the same post is also invalid. Also, please follow the directions given on rafflecopter carefully.

The winner must be a follower of my blog with a valid winning entry. He/She must also reply via e-mail within 48hrs from the time the winner is announced. Violation of any of these may cause the cancellation of your entry so please be careful. Shipping method and its cost will be chosen and paid by me.

The giveaway will run from April 14, 2012 to  June 30, 2012 or when the number of followers are reached whichever is longer. 

Mar 19, 2012

Nail Art Tutorial : Flower Bed

Another simple nail art tutorial for everyone to try. You will only need two accessories to follow this nail art tutorial. Simply click on the link provided below to redirect to those post. Hope you like this one.

Instructions:
1. Choose your base coat. I'm using OMG nail polish in Jet black. Darker base emphasizes the nail sequence.

2. Swipe some glue on the part of your nails nearest to the cuticle.

Feb 18, 2012

Review : Sassy Nail Art

I saw this in Watsons when i went shopping for a few bath supplies. It's really affordable since it's only Php 36 each with a net weight of 10ml. It was also available in blue but I decided to get black and red only since these are my nail color staples.

Feb 12, 2012

Nail Art Tutorial : Berries for V-day


Happy hearts day everyone! Here's my V-day Nail Art Tutorial for you ladies. I hope you like it. It's nothing hot or sophisticated. If I'll describe it, it's more like flirty and playful. It's a little difficult compare to the first that I made because the tips but it's worth the patience.

Instructions :

  1. Swipe Caress nail polish in Platinum to be the base color of your nails.
  2. With Sassy Nail Art in black, make a triangle tip then fill it up with the same polish.
  3. Taking the red Sassy Nail Art, create another triangle on top of the black.
  4. With the same red nail polish, draw a line under the black.
  5. Add some gray Klick Nail Sequence beneath the red line.
  6. Place a purple gem on one end of your nails then add a green tear drop shape gem to serve as a leaf.
  7. Finish it off with a final coat of Caronia Colorless.

Jan 28, 2012

Nail Art Tutorial : Floral Nail Blush


This will be my first nail art tutorial ever. The design is really simple and all products mentioned are linked to the related review/haul posts. Please let me know if you like it by posting a comment below.

Instructions :

  • Color your nails with Caronia in Italian Nude. This will serve as the base color of your nails.
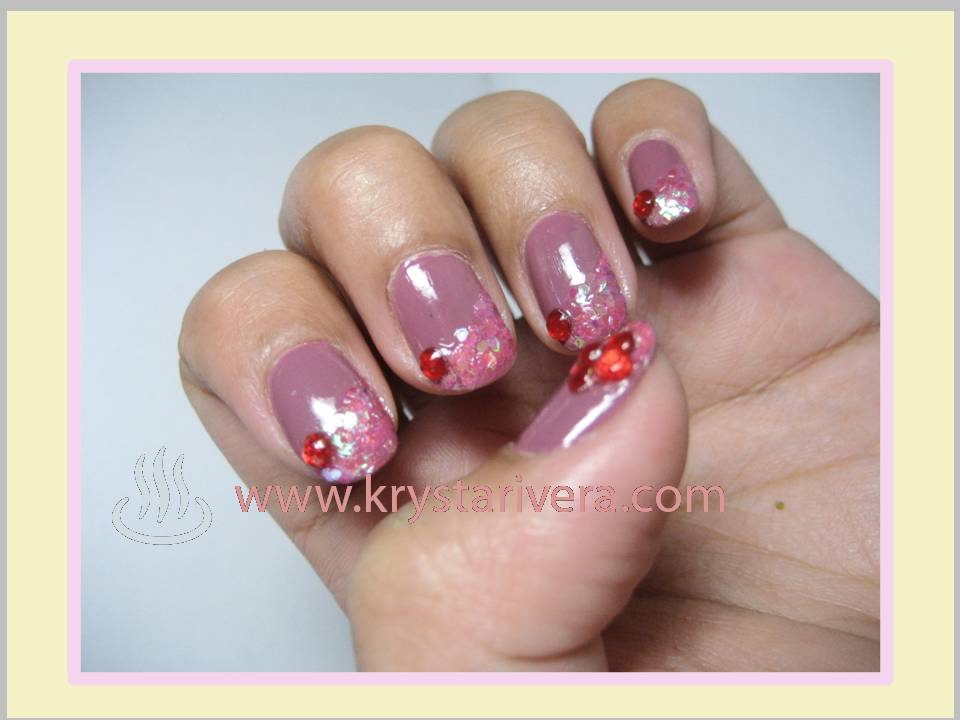
  • Put glue or clear nail polish at the tip of your nails on a diagonal direction.
  • Dip your nails on the pink Nail Sequence ( Nail Art Accessories Haul ) then  flatten them. Brush off the excess but make sure to maintain the diagonal tip.
  • Put a red nail gem on the higher end.
  • Lastly, seal the design with clear nail polish.

Jan 18, 2012

Haul : Nail Art Accessories


I went to personal care section of the mall and here’s a few that I got. I don’t know exactly  what they are called but they are both from the makers of Klick and OMG Nail Polish. 

One is like small sequence and the other is like floral shaped chips and they both cost Php 50. The Nail Sequence is really thin and tiny you cannot place it on your nails individually with tweezers. Either you sprinkle it or dip your nails on it or mix it with the polish for application. You can also use a toothpick lightly dip on clear nail polish to pick up a few sequence at a time.

Related Posts Plugin for WordPress, Blogger...